This year's Chairman's Challenge at Flowerpatch Quilters exhibition was "Love is in the Air". It was set by Liz to compliment the theme of the upstairs room which was "LOVE".
Firstly, here are a few pics from the room:
And these were the entries for the challenge:
Dawn's Woolly White Doves and Dy's Love Cushion
Karen's Airmail Love Letter and Sue's Home Is ......
Liz's Winter Romance and Pauline's Christmas Angel
Marie's Tree of Hearts and Lois' Birds, Rabbits and Butterflies pursuing Love
Mary's Heart Balloons and Chris' Balloons
Nina's Stork and Iris' Hearts
Chrissie's Dandelion Hearts and her Wi-Fi doorstop
My Love to Stitch book
Yet again, I know that somehow I've missed one or two items for which I apologise. It was brilliant to have so many entries.
Happy Sewing
Anita x
When I saw the fabric that we were to use for Sue's Silk Challenge I just knew that I had to try lino printing on such a lovely texture. The final result of this is my apples and pears letter rack.
The apple and pear were cut on two separate lino boards and I have overlapped them in the design to add an extra feature.
After printing and drying I laid the silk fabric on some thin wadding and stitched ....
and stitched ....
and stitched.
I lined the letter rack with some dark red cotton fabric and put stiff cardboard between the silk fabric and the lining to make the curved front and the straight back.
The bottom is a thickish piece of wood, cut to help keep the shape.
I must admit that at first I was going to call my creation a vase, but it looks great on my shelf holding the correspondence that requires attention.
Wishing you a h-apple and pear-fect day
Anita x
At the Flowerpatch Quilters exhibition we always have a sales table of secondhand books and magazines, and members also donate their unwanted fabric - all to be sold for charity. At the end of the 2018 exhibition there was a large quantity of lovely silk, suiting weight fabric, in a natural shade, and Sue decided that every member should have a piece, approximately 16" x 10", to make into something for the 2019 exhibition, which was a couple of weeks ago. What a lovely lot of diverse items were made.
Wall hangings of different shapes and sizes:
Numerous bags and pouches:
Cushions - big and small
More pouches, a box and picture frame:
A scarecrow
and a letter rack.
I know I've missed a couple of lovely items so apologies to the makers, and thank you to Sue for organising this challenge.
Finally, I must tell you "Ellen's Story". -
Ellen had a large quantity of fabric for many years in her cupboard, and every so often she would take it out with the good intention of making something - only to change her mind and back it would go into the cupboard. Last exhibition she decided that enough was enough and she gave it to the fabric sales table to sell for the charity. At the end of the exhibition it hadn't been sold which was when Sue decided upon the challenge. Ellen was horrified to discover that she had to have a piece of the dreaded fabric back!! ...... "Oh no, I thought I'd seen the last of that!!"
Happy stitching
Anita x
We do like to set ourselves challenges at Flowerpatch Quilters and I loved sewing this one, especially as it turned out far better than we ever expected.
I know I'm biased, but I actually like it far more than the original painting. Dy had been to a Picasso exhibition in France and I believe that this picture was used in the advertising poster. We love the vibrant colours.
Jacqueline was divided into 12 rectangles and a different person chose to sew each section.
They were each given a monochrome drawing of their part along with a small piece of blue and/or red to match for the background. The white linen was provided for Jacqueline's skin. When finished Dy did a great job of sewing them together, and I did some quilting and finishing off.
Here's another look - she's stunning!
Happy stitching - Anita
Another exciting Flowerpatch Quilters exhibition is happening shortly from Tuesday 6th to Saturday 10th August 2019, 10 am to 4 pm each day at Central Methodist Church Hall, Launceston, PL15 8BA. This year we have sewn three very different challenges and, after our preview evening last week, the exhibition promises to be as interesting and diverse as ever ...... and, we hope, inspirational.
I took some snippets of pics of some of the quilts.
There are a lot of birds!
a few monkeys
and many flowers.
A plethora of hearts for our "Love" themed room
and what a sad life it would be without our sewing machines!
A big 'thank you' to Jo Colwill for inviting us to Cowslip Workshops for our preview evening, and treating us to delicious lemon drizzle cake!
Last month I omitted to tell you about the Flowerpatch June meeting when we welcomed Katy Choroszewska of Tamar Threads. She gave a brilliant and entertaining talk all about her love of colour. She hand dyes and sells fabric and threads from her home in Gunnislake, Cornwall. These are some of the threads that she brought along.
What beautiful colours.
I certainly learnt a lot about colour from Katy and I'm sure there isn't any "goose turd green" or "rotting shellfish" colours amongst her threads. These were a couple of names for colours that had been used in the distant past!!
If you get the chance to hear a talk by Katy you can be assured of an enthralling and amusing time. She is not only a hand dyer but also an accomplished embroiderer.
Thank you, Katy, for your visit to Flowerpatch.
Do come along and see our exhibition if you're able - we have magazines, books and fabric for sale as well as refreshments ...... and cake! - Anita x
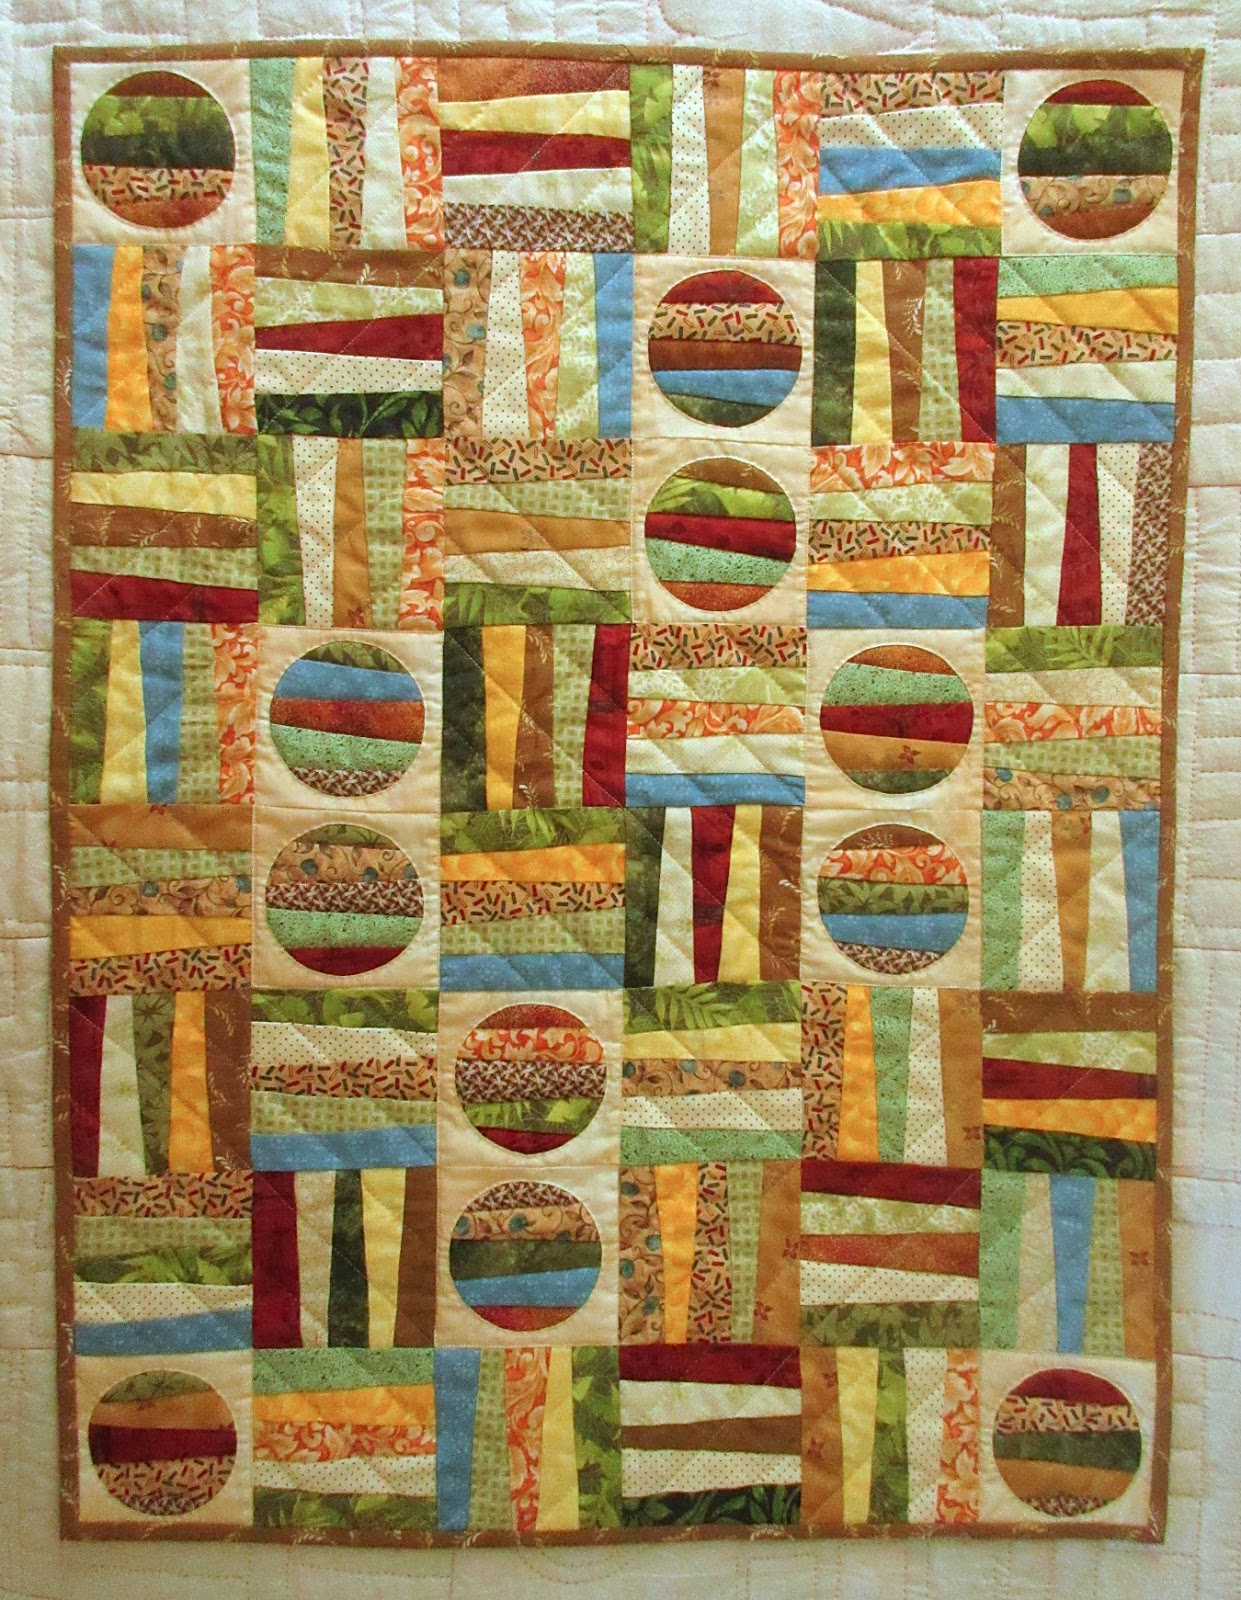
After a few stitched forays which ended up in the bin, I decided that it was time to go back to my circles and strings,combining the two in this 2' x 3' quilt.
It was the right decision as I thoroughly enjoyed making this quilt and it was finished in no time.
I thought that you might like to know the method I used for my foundation pieced string blocks which were all done in the same way.I sorted my fabrics into darks, mediums and lights.
I used strips of medium and light fabrics for 24 blocks;
and dark and light fabrics for 12 of the blocks.
The 12 string circles are in mediums and darks.
This is the 4½" paper square for the foundation piecing. I marked the edges at the distances shown and ruled the lines with a pencil, pressing very firmly to make it easier to fold along the line at a later stage.
I cut my strips of fabric a tad over 1½" wide and at least 5" long. Here I have 3 darks and 2 lights.
Starting from the left, I put the first two fabrics right sides together with the back of the dark fabric nearest to me. I laid the paper pattern over the top so that the first pencil line ran along near the right edge of the fabrics, just leaving enough for a small seam allowance, and sewed along this pencil line. It's a good idea to have a small stitch length when sewing to perforate the paper, making it easier to remove at the end.
I finger pressed the seam open, turned the paper over and folded it back along the second pencil line.Now you can see the edge of the second fabric which I cut at ¼" from the fold of the paper. I put the next fabric beneath the second fabric with right sides together and opened up the paper.........
........ ready to sew the next pencil line.
Here I am doing the next fabric strip in the same way.
When all the strips are sewn onto the paper it usually looks a bit of a mess, but is transformed after trimming.
I used the same light background fabric for all my 3¼" circles, but it was mottled so each square differs very slightly. Although I really like the quick method of sewing reverse applique circles by machine (which you can read about in my older post), I chose to sew these by hand using this method - then I could do it sitting on the sofa watching TV in the evening. I used a 4" paper foundation to make the string blocks for the circles.
Here is a link to a printer friendly PDF showing a pattern for the quilt and for the paper foundation............. Strings and Circles Quilt
QUILTING
After sewing all the blocks together it was time to think about the quilting. I wanted something a bit different so chose to emphasise the directions of the dark / light blocks with some diagonal straight lines sewing them by machine and by hand.
You may be able to see the quilting better on the back -
I had seen the smashing effect of alternating machine and hand quilting on a quilt in Victoria's post "Waste not, want not" , but I think that maybe my lines are too far apart this time to create the desired look. This pic below shows how good it can be.
And a last look at my quilt
Thank you for reading if you made it this far!!
Finally this is a quilt that I have made with some dear friends. We have called it "Bluebird Avenue" and it will be raffled in aid of Macmillan Nurses
Happy Stitching- Anita x