
It was the right decision as I thoroughly enjoyed making this quilt and it was finished in no time.
I thought that you might like to know the method I used for my foundation pieced string blocks which were all done in the same way.I sorted my fabrics into darks, mediums and lights.
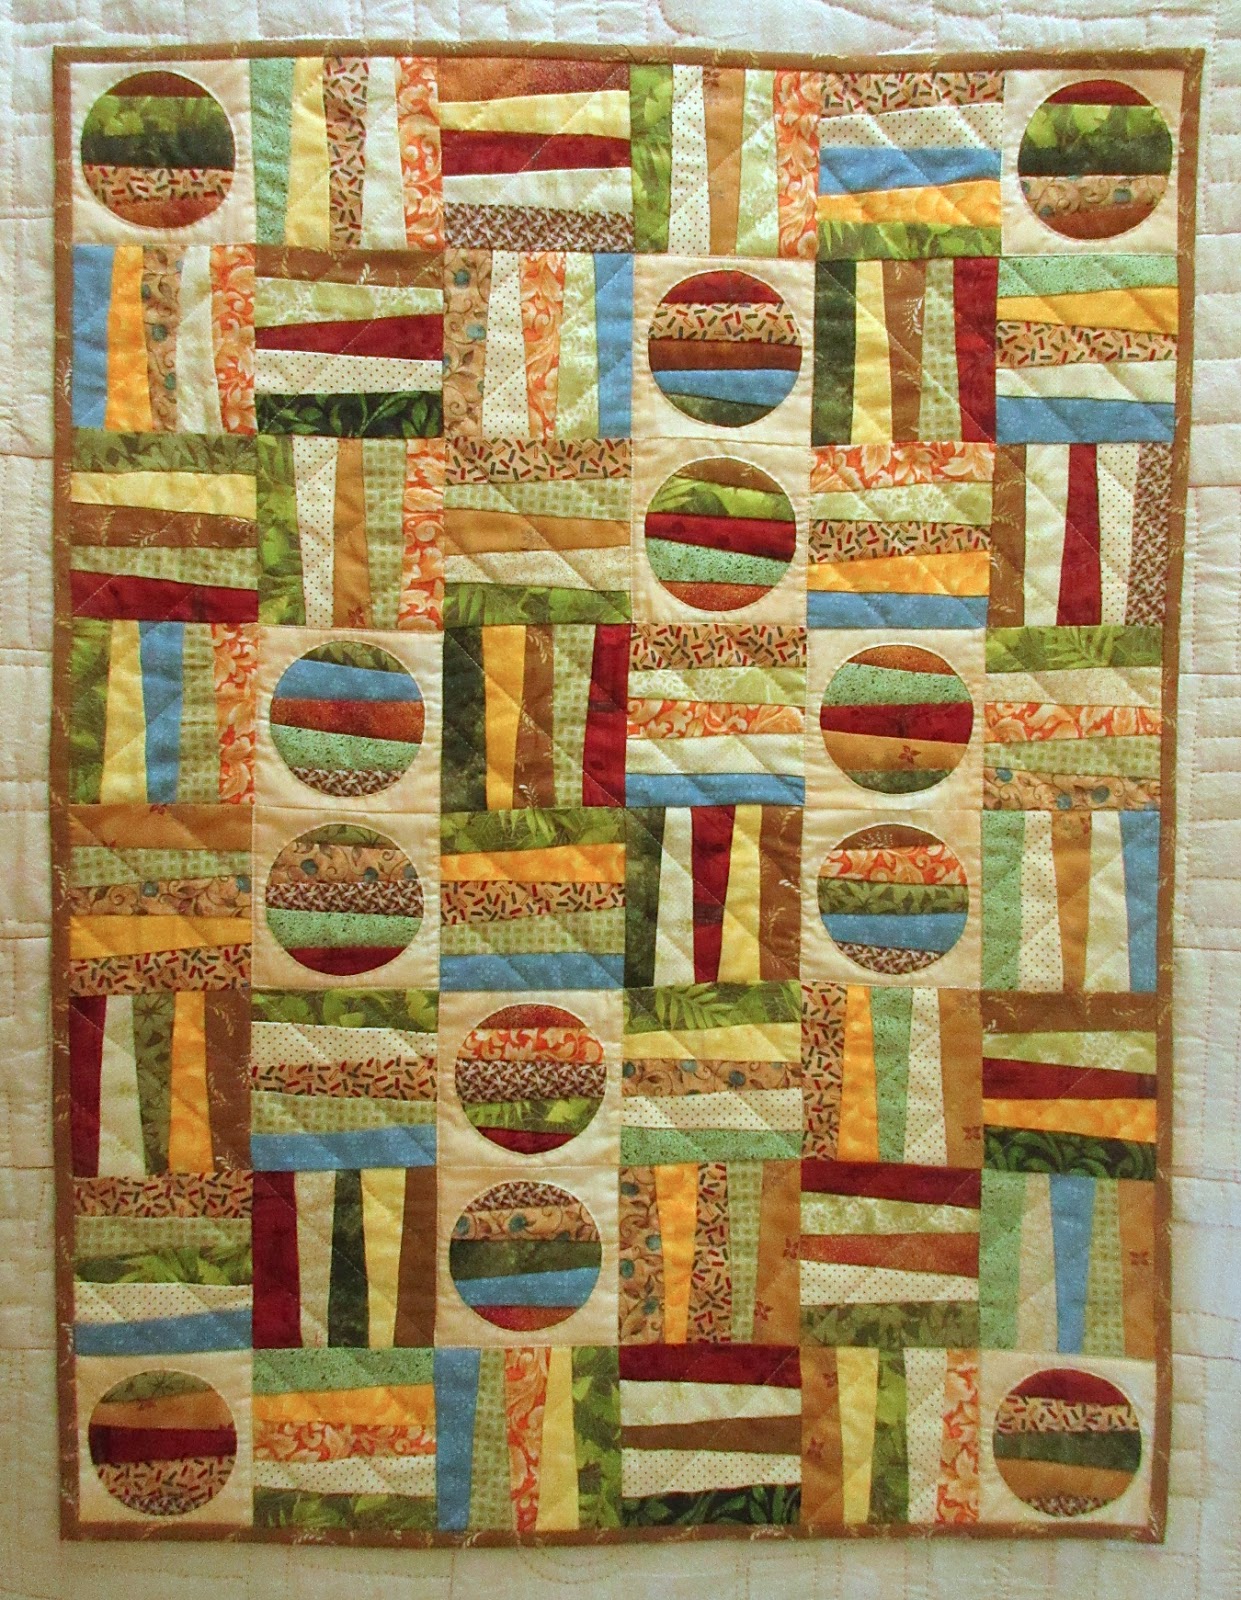
I used strips of medium and light fabrics for 24 blocks;

and dark and light fabrics for 12 of the blocks.

The 12 string circles are in mediums and darks.

This is the 4½" paper square for the foundation piecing. I marked the edges at the distances shown and ruled the lines with a pencil, pressing very firmly to make it easier to fold along the line at a later stage.

I cut my strips of fabric a tad over 1½" wide and at least 5" long. Here I have 3 darks and 2 lights.

Starting from the left, I put the first two fabrics right sides together with the back of the dark fabric nearest to me. I laid the paper pattern over the top so that the first pencil line ran along near the right edge of the fabrics, just leaving enough for a small seam allowance, and sewed along this pencil line. It's a good idea to have a small stitch length when sewing to perforate the paper, making it easier to remove at the end.

I finger pressed the seam open, turned the paper over and folded it back along the second pencil line.Now you can see the edge of the second fabric which I cut at ¼" from the fold of the paper. I put the next fabric beneath the second fabric with right sides together and opened up the paper.........

........ ready to sew the next pencil line.

Here I am doing the next fabric strip in the same way.

When all the strips are sewn onto the paper it usually looks a bit of a mess, but is transformed after trimming.

I used the same light background fabric for all my 3¼" circles, but it was mottled so each square differs very slightly. Although I really like the quick method of sewing reverse applique circles by machine (which you can read about in my older post), I chose to sew these by hand using this method - then I could do it sitting on the sofa watching TV in the evening. I used a 4" paper foundation to make the string blocks for the circles.

Here is a link to a printer friendly PDF showing a pattern for the quilt and for the paper foundation............. Strings and Circles Quilt
QUILTING
After sewing all the blocks together it was time to think about the quilting. I wanted something a bit different so chose to emphasise the directions of the dark / light blocks with some diagonal straight lines sewing them by machine and by hand.

You may be able to see the quilting better on the back -

I had seen the smashing effect of alternating machine and hand quilting on a quilt in Victoria's post "Waste not, want not" , but I think that maybe my lines are too far apart this time to create the desired look. This pic below shows how good it can be.

And a last look at my quilt

Thank you for reading if you made it this far!!
Finally this is a quilt that I have made with some dear friends. We have called it "Bluebird Avenue" and it will be raffled in aid of Macmillan Nurses

Happy Stitching- Anita x
No comments:
Post a Comment