Showing posts with label bags. Show all posts

Sunday, 3 January 2021

Recycled Denim Bags

It's always the knees of denim jeans that wear out and after patching one time, enough is enough. I usually save the backs of the legs for future patches and sometimes the denim pile builds up so that I can make a bag ...... or two.

I made two bags before Christmas.

This first has a panel of appliqued red leaf shapes on the front, which I have embroidered. I sewed a flange of red and yellow striped fabric around the panel and used the same fabric for the long handle. The bag has a zip closure at the top, just like a pouch and a boxy bottom.

The back of the bag has a handy zipped pocket.

This second bag is a tad more sedate and the panel has appliqued circles, a fabric insert and white hand stitching.

Again, the back has a zipped pocket.

These are links to two previous post about similar bags:-

2 Sashiko Bags and More Sashiko - More Bags

Happy New Year to you all - 2021 must surely be better than 2020!!?? - Anita xx

Friday, 16 August 2019

Flowerpatch Silk Fabric Challenge

At the Flowerpatch Quilters exhibition we always have a sales table of secondhand books and magazines, and members also donate their unwanted fabric - all to be sold for charity. At the end of the 2018 exhibition there was a large quantity of lovely silk, suiting weight fabric, in a natural shade, and Sue decided that every member should have a piece, approximately 16" x 10", to make into something for the 2019 exhibition, which was a couple of weeks ago. What a lovely lot of diverse items were made.

Wall hangings of different shapes and sizes:


Numerous bags and pouches:


Cushions - big and small


More pouches, a box and picture frame:

A scarecrow


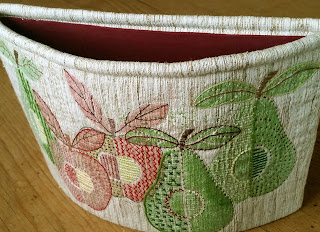
and a letter rack.

I know I've missed a couple of lovely items so apologies to the makers, and thank you to Sue for organising this challenge.

Finally, I must tell you "Ellen's Story". - 
Ellen had a large quantity of fabric for many years in her cupboard, and every so often she would take it out with the good intention of making something - only to change her mind and back it would go into the cupboard. Last exhibition she decided that enough was enough and she gave it to the fabric sales table to sell for the charity. At the end of the exhibition it hadn't been sold which was when Sue decided upon the challenge. Ellen was horrified to discover that she had to have a piece of the dreaded fabric back!! ...... "Oh no, I thought I'd seen the last of that!!"

Happy stitching
Anita x

Monday, 17 December 2018

Sewing String Blocks for a Bag

I've never sewn a string quilt but I love some of the designs that TheEclecticAbuela comes up with on her blog and, with my two baskets of tiny scraps overflowing, I thought it was about time I had a go. I intended to make a mini quilt, but just went with the flow and ended up with two square panels to use on each side of a shoulder bag. I thought that this would be a really easy project, but I seemed to have to make quite a few decisions.

I started by cutting strips less than 1" wide from my fabric bits, although I did cut the really short pieces for the corners a little wider so that they wouldn't completely disappear into the seams. 

Decision 1 - should I cut dominant fabrics narrower so that they don't ..... dominate? By the time I came to do the second lot of squares I'd decided that the answer was "YES"
I've marked a couple of the 'too wide' strips, in the first block that I did, with arrows, but there were more which I unpicked and changed.


I cut out 2" squares from paper - this is the size that I wanted the string squares to be before sewing them all together. I sewed 4 string squares at a time, without cutting the threads between them, so as to save on thread ...... and thread snarl ups.

I laid a strip across the paper square from corner to corner, right side up.

Decision 2 - should I mark a diagonal line across the paper square so that all the fabrics are at the same angle? "NO" because the wonky angles made the finished block more interesting ...... and even if I tried to keep them straight they'd be sure to go wonky!

I laid another strip on top of the first, right sides together and sewed them together with a small seam allowance and short stitch length.

I folded back the second piece of fabric and trimmed off some of the excess fabric around the edge of the paper square.

Now I could carry on in the same fashion, stitching all my seams through the paper (and sometimes I lost the plot and this is what I did!!), but it's a real drag when you get to the end of sewing the square and you have all that paper to tediously remove. Instead I sewed the next seams just through the two layers of fabric with the paper folded back out of the way, checking each time that the paper square would be covered by the new fabric.


In the pics below I'm adding more strips of fabric in the same way.

Once all the strips are sewn on I trim the edges back to the paper size.

I do like before and after pics - so this is where my squares get a makeover! Don't they look a mess before I trim them?

And on the back only one stitching line through the paper which tears off quickly and easily.

Then Decision 3 - how to arrange the squares for my finished block - I did both 6" blocks the same and (Decision 4) I pressed all the seams open. I added a check border. I laid them on some thin cotton wadding and machine quilted a spiral on each, starting just off centre and extending into the border.


These are the ingredients for my bag:

- 2 sides. I sewed some brown fabric from old trousers to the edges of the blocks to make them 10" wide by 11½" long
- 2 gingham linings the same size
- A 36" handle - the longest I could cut from a trouser leg. Cut 2½" wide and folded to make 4 thicknesses. I would have liked this a bit longer so I made the handle holding loops longer to compensate.
- 2 handle holding loops cut from the brown check
- A zip (from the trousers) with a brown check tab on each end. I would have liked the zip to be an inch longer but heyho.

I made up the bag in the same way as my last Sashiko Bag including a Boxy Bottom.


I didn't make much of a dent in my baskets of scraps. The blue/red/pink basket looks untouched and the "every other colour" basket seems just as full, but not quite so colourful!!

Well done if you've stuck with my marathon of a blog post to the very end .... and "thank you". - Anita x

I'm linking up with Fiber Tuesday


Friday, 5 January 2018

Sewing Folio

I am feeling so pleased with myself today that I had to write this blog post and show you what I have been making!


I'm not usually very good at following other people's instructions, but this pattern is in the book Stitched Sewing Organizers by Aneela Hoey and was beautifully explained. I'm quite a novice at making things like this so am really pleased with the result and I'm sure I shall use my Sewing Folio a lot.

I'm linking up with Crazy Mom Quilts Finish it up Friday - especially as Amanda Jean recommended the book a couple of weeks ago - for which I am most grateful.

Happy stitching - Anita x

Saturday, 30 September 2017

More Sashiko - More Bags!

I just had to do another two Sashiko patterns and this time I knew they would be used to make a bag. I had enjoyed making my last cross strap, zipper bag so much and I use it all the time. I decided to do the Sashiko stitching on upcycled denim - we get through a lot of jeans in this house!!
These are the two patterns - they both start with a 6 x 6 grid of 1" squares

and this is the bag that I made - there is a Sashiko design on each side.

As the Sashiko is stitched on the same denim fabric as the bag I decided to add a fabric flange to set off the stitched panel and I thought you might like to know how I do this.

I usually want a really small flange so I cut a strip of fabric just " wide, fold it in half along its length and press it. I mark the stitched panel with a square around the design to show just where I want the flange fold to sit (unfortunately I only seem to have blue Frixion Pens handy so you probably can't see my line :) ) I stitch it to the panel quite close to the raw edges of the flange as I don't want these stitches to show after I add the blue denim border.

I sew the flange to the sides first and then to the top and bottom as this is the order I want to sew on the denim borders. This is to avoid bulky seams at the top where the zipper goes, and the bottom which I like to make boxy.

I cut the denim borders a bit wider and longer than I need them and I don't trim up the panel yet.

I carefully line up the edge of the border with the raw edge of the folded flange and sew a ¼" seam - this will give me my tiny flange.

After sewing on the two side borders I trim the seam allowance and the excess from the top and bottom of the border denim

After sewing on all 4 borders I top stitch around the panel.

These are the two finished sides of my bag and can you see that the panels aren't in exactly the same position? I make loads of mistakes when sewing, but this isn't one of them!! When I sew up the bag I don't want the seams in the back and front to meet on the side seam.

Now it's bag making time and these are all the things I need to make my bag.


  • 2 bag sides and 2 linings, all measuring 10" x 12"
  • An 8" zipper with tabs on each end
  • A denim handle, approx 40" long and cut 2¼" wide, folded with the raw edges inside to make 4 layers and top stitched
  • 2 handle loops (I originally intended to use the flange fabric, but decided that the zipper tab fabric looked better). These are 4½" long and were cut 1¼" wide and folded like the handle. It's a good idea to cut a longer length than you need so that you can discard the ends which can go a bit awry in the sewing machine.

I have posted before about making a zipper pouch, but this is a very quick run through of attaching the zip:

Bag fabric right side up, zipper right side down and sew along near to the edge.

Lining right side down and sew along near to the zip.

This is the zipper sandwiched between the bag fabric and the lining. The zipper tabs have been trimmed.

The other bag fabric right side up, the other side of the zipper right side down and sew along near to the edge.

Lining right side down and sew along near to the zip.

It looks like this - outside and inside.

That's the hard part done as far as I'm concerned and it just remains to sew up the sides, but I thought you might like to see how I position the handle loops just beneath the zipper tabs before I sew the sides together.

I also did a boxy bottom to my bag which you can read about in my post "Boxy Bottoms".
Here's another look at the finished bag.

I also made a bag in the same design, but slightly smaller, for my sewing friend's special birthday. I just had to use these very apt fabric panels. The left one says "best friends" and the right one says "piecing together a quilt".

This is the bag -

Well! - that's quite enough from me!! I hope that you have found something useful in the above - I know that I shall be returning to this post to refresh my memory when making my next bag!

I'm linking up with Crazy Mom Quilts - Finish it up Friday

Happy Sewing - Anita x