Showing posts with label tutorial. Show all posts

Sunday, 14 March 2021

Slow Stitching - Shapes

While we can't get together for our meetings (it's been a year since our last monthly meeting because of Covid19) we have been sending out a regular email to Flowerpatch Quilters members with any news and a monthly challenge. For February I devised a mini slow stitching workshop that everyone could do, or not, as they liked, at home. I really enjoyed doing it myself and completed six 6" blocks.


My own idea of slow stitching is that when you start you have no clear plan in mind and just let the applique and hand stitching grow. The most difficult bit is actually getting started! For that reason I suggested cutting out a circle; square or rectangle; and a triangle and sewing these to the background. The full instructions / suggestions can be found in my printer friendly pdf file - Slow Stitching Mini Workshop

I have sewn my six blocks together with thick thread to make hinges. They can now be hung vertically in a single line, or folded concertina fashion making a "book". This is closed with a strip of cute house fabric and a button. To make this work I sewed three buttonholes in the strip and as I do very little normal type sewing, this was scary and exciting for me. :) I don't know why I was concerned - I just pressed start and the machine beeped when it was finished - I love my new machine!

This pic shows my blocks and on the back you can see the strip hanging down. The top of the strip has one of the buttonholes as a hole to slip over a nail or hook.


And this pic shows them folded into my "book" -  neat and tidy.


All in all a very enjoyable project - so much so that I've now started on slow stitching concertina book 2 with the theme of flowers.

Happy Stitching - Anita x

Thursday, 23 January 2020

Flowers in Vases

I loved every minute of making this little quilt.

It measures roughly 31" x 25".

I started by sewing the vases of flowers using needle turned applique with embroidered stems and adding a little embroidery to the vases. When almost completed I did some shading and colouring with Inktense pencils - that was a bit scary as I could so easily have ruined all that applique work! This is a before and after using the Inktense.

Here is a link to the drawings of the flowers in their vases if you'd like to use them anytime. They measure roughly 5" x 7". -  Flowers in Vases

My applique was sewn on a cream fabric measuring 6" x 8" plus seam allowance. I sewed a strip of 8 flying geese 2" x 8" to the right hand side, 4 geese 8" x 1" to the top, a 2" x 9" strip of strings of scrappy fabrics to the left hand side and 5 square within square blocks measuring 2" x 2" to the bottom. This made an interesting block 10" x 11" ....... or thereabouts. (add seam allowance to all these measurements)


The string strips are so handy as they mean you can adjust the width of the block, if need be, before adding the squares at the bottom. I sewed all the flying geese by the "no waste flying geese" method in SuzyQuilts - Super Simple Flying Geese Tutorial

These are the other 4 blocks

You can see that I have used the Inktense pencils on the petals, vase and some of the leaves. I always imagine that the light is coming from the top left-hand corner. I was tempted to add a shadow of the vase on the cream fabric but was too frit!

I sewed two rectangular blocks as below to fit to the top and bottom of the middle flower/vase block. These measure 10" x 6½ "

I joined the 2 blocks on the left, and on the right, with another string strip so that I could match the length this made with the centre panel, by adjusting the width of this strip.

These are the 3 panels that make up the quilt

I quilted by machine along some of the seams and by hand around the applique and in the small yellow squares.

I sewed a narrow green border to the top and both sides of the quilt and then added binding in a blue and white fabric which I had used sparingly in the string strips.

And a final look:

Mixed in with the pleasure of a finish is the rather peculiar feeling of loss - this quilt doesn't need me anymore!! Best move on to the next ...... quickly!

Happy Days - Anita x

Afterthought ........ this photo edited pic gives an idea of what the blocks would look like made up into a larger quilt.

Thursday, 13 June 2019

Strings and Circles Quilt

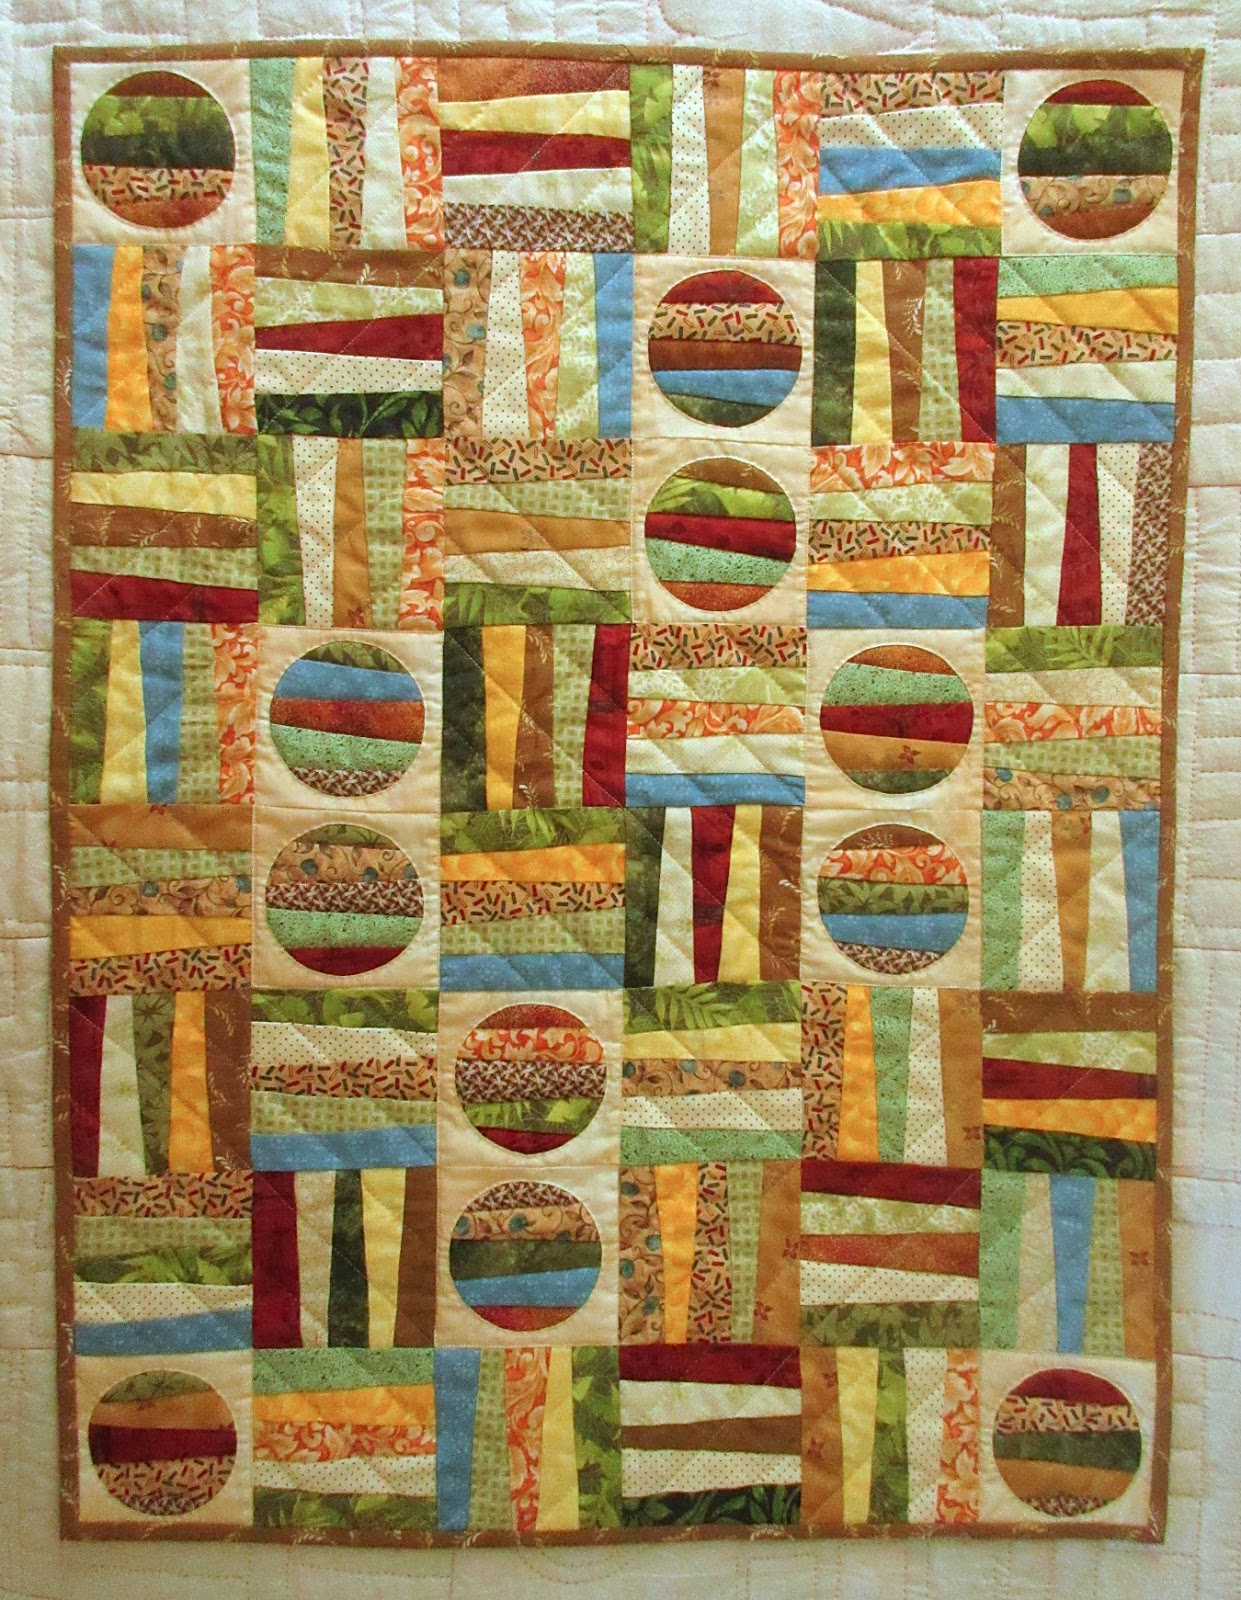
After a few stitched forays which ended up in the bin, I decided that it was time to go back to my circles and strings,combining the two in this 2' x 3' quilt.

It was the right decision as I thoroughly enjoyed making this quilt and it was finished in no time.

I thought that you might like to know the method I used for my foundation pieced string blocks which were all done in the same way.I sorted my fabrics into darks, mediums and lights. 
I used strips of medium and light fabrics for 24 blocks; 

and dark and light fabrics for 12 of the blocks.

The 12 string circles are in mediums and darks.


This is the 4½" paper square for the foundation piecing. I marked the edges at the distances shown and ruled the lines with a pencil, pressing very firmly to make it easier to fold along the line at a later stage.

I cut my strips of fabric a tad over 1½" wide and at least 5" long. Here I have 3 darks and 2 lights.

Starting from the left, I put the first two fabrics right sides together with the back of the dark fabric nearest to me. I laid the paper pattern over the top so that the first pencil line ran along near the right edge of the fabrics, just leaving enough for a small seam allowance, and sewed along this pencil line. It's a good idea to have a small stitch length when sewing to perforate the paper, making it easier to remove at the end.

I finger pressed the seam open, turned the paper over and folded it back along the second pencil line.Now you can see the edge of the second fabric which I cut at ¼" from the fold of the paper. I put the next fabric beneath the second fabric with right sides together and opened up the paper.........

........  ready to sew the next pencil line.

Here I am doing the next fabric strip in the same way.

When all the strips are sewn onto the paper it usually looks a bit of a mess, but is transformed after trimming.

I used the same light background fabric for all my 3¼" circles, but it was mottled so each square differs very slightly. Although I really like the quick method of sewing reverse applique circles by machine (which you can read about in my older post), I chose to sew these by hand using this method - then I could do it sitting on the sofa watching TV in the evening. I used a 4" paper foundation to make the string blocks for the circles.

Here is a link to a printer friendly PDF showing a pattern for the quilt and for the paper foundation............. Strings and Circles Quilt

QUILTING
After sewing all the blocks together it was time to think about the quilting. I wanted something a bit different so chose to emphasise the directions of the dark / light blocks with some diagonal straight lines sewing them by machine and by hand.

You may be able to see the quilting better on the back - 

I had seen the smashing effect of alternating machine and hand quilting on a quilt in Victoria's post "Waste not, want not" , but I think that maybe my lines are too far apart this time to create the desired look. This pic below shows how good it can be.

And a last look at my quilt

Thank you for reading if you made it this far!!

Finally this is a quilt that I have made with some dear friends. We have called it "Bluebird Avenue" and it will be raffled in aid of Macmillan Nurses

 Happy Stitching- Anita x

Monday, 17 December 2018

Sewing String Blocks for a Bag

I've never sewn a string quilt but I love some of the designs that TheEclecticAbuela comes up with on her blog and, with my two baskets of tiny scraps overflowing, I thought it was about time I had a go. I intended to make a mini quilt, but just went with the flow and ended up with two square panels to use on each side of a shoulder bag. I thought that this would be a really easy project, but I seemed to have to make quite a few decisions.

I started by cutting strips less than 1" wide from my fabric bits, although I did cut the really short pieces for the corners a little wider so that they wouldn't completely disappear into the seams. 

Decision 1 - should I cut dominant fabrics narrower so that they don't ..... dominate? By the time I came to do the second lot of squares I'd decided that the answer was "YES"
I've marked a couple of the 'too wide' strips, in the first block that I did, with arrows, but there were more which I unpicked and changed.


I cut out 2" squares from paper - this is the size that I wanted the string squares to be before sewing them all together. I sewed 4 string squares at a time, without cutting the threads between them, so as to save on thread ...... and thread snarl ups.

I laid a strip across the paper square from corner to corner, right side up.

Decision 2 - should I mark a diagonal line across the paper square so that all the fabrics are at the same angle? "NO" because the wonky angles made the finished block more interesting ...... and even if I tried to keep them straight they'd be sure to go wonky!

I laid another strip on top of the first, right sides together and sewed them together with a small seam allowance and short stitch length.

I folded back the second piece of fabric and trimmed off some of the excess fabric around the edge of the paper square.

Now I could carry on in the same fashion, stitching all my seams through the paper (and sometimes I lost the plot and this is what I did!!), but it's a real drag when you get to the end of sewing the square and you have all that paper to tediously remove. Instead I sewed the next seams just through the two layers of fabric with the paper folded back out of the way, checking each time that the paper square would be covered by the new fabric.


In the pics below I'm adding more strips of fabric in the same way.

Once all the strips are sewn on I trim the edges back to the paper size.

I do like before and after pics - so this is where my squares get a makeover! Don't they look a mess before I trim them?

And on the back only one stitching line through the paper which tears off quickly and easily.

Then Decision 3 - how to arrange the squares for my finished block - I did both 6" blocks the same and (Decision 4) I pressed all the seams open. I added a check border. I laid them on some thin cotton wadding and machine quilted a spiral on each, starting just off centre and extending into the border.


These are the ingredients for my bag:

- 2 sides. I sewed some brown fabric from old trousers to the edges of the blocks to make them 10" wide by 11½" long
- 2 gingham linings the same size
- A 36" handle - the longest I could cut from a trouser leg. Cut 2½" wide and folded to make 4 thicknesses. I would have liked this a bit longer so I made the handle holding loops longer to compensate.
- 2 handle holding loops cut from the brown check
- A zip (from the trousers) with a brown check tab on each end. I would have liked the zip to be an inch longer but heyho.

I made up the bag in the same way as my last Sashiko Bag including a Boxy Bottom.


I didn't make much of a dent in my baskets of scraps. The blue/red/pink basket looks untouched and the "every other colour" basket seems just as full, but not quite so colourful!!

Well done if you've stuck with my marathon of a blog post to the very end .... and "thank you". - Anita x

I'm linking up with Fiber Tuesday


Sunday, 16 September 2018

Practising reverse applique at Flowerpatch

Do we really do enough practising when learning a new sewing skill or revisiting an old one? If you're like me the answer is "No"- I just want to get straight on and make the quilt, cushion, .......... whatever! But saying to yourself that you're just practising really takes the pressure off getting it right first time - you know you'll get there in the end - you only need to keep ..... practising. :)

So at Flowerpatch Quilters meeting last Thursday we PRACTISED reverse applique by sewing this heart within a ring.

* We had a 6" square of calico for the top fabric and a 5½" square of coloured fabric beneath.
* We traced the design onto the calico using a Frixion or other erasable marker, or a very sharp pencil, shading in the pattern where the coloured fabric will show. This is handy to do if your design is a bit complicated as you don't want to be cutting in the wrong area.
* We made a small snip with sharp pointy scissors in the shaded areas. This makes it less likely that you'll cut through both layers when you put the fabrics together.
* After putting the calico on top of the coloured fabric, making sure that the design was within the latter's edges, we tacked around the shaded areas leaving space for turning under the edge of the calico.
* We cut through just the calico in the shaded areas leaving a scant ¼" of calico to turn under.

* We cut small snips into the inner curves almost to the line - more snips for tighter curves.

Now I know you'll have your own way of tackling the sewing - as we did at the meeting, but this is how I approach it.
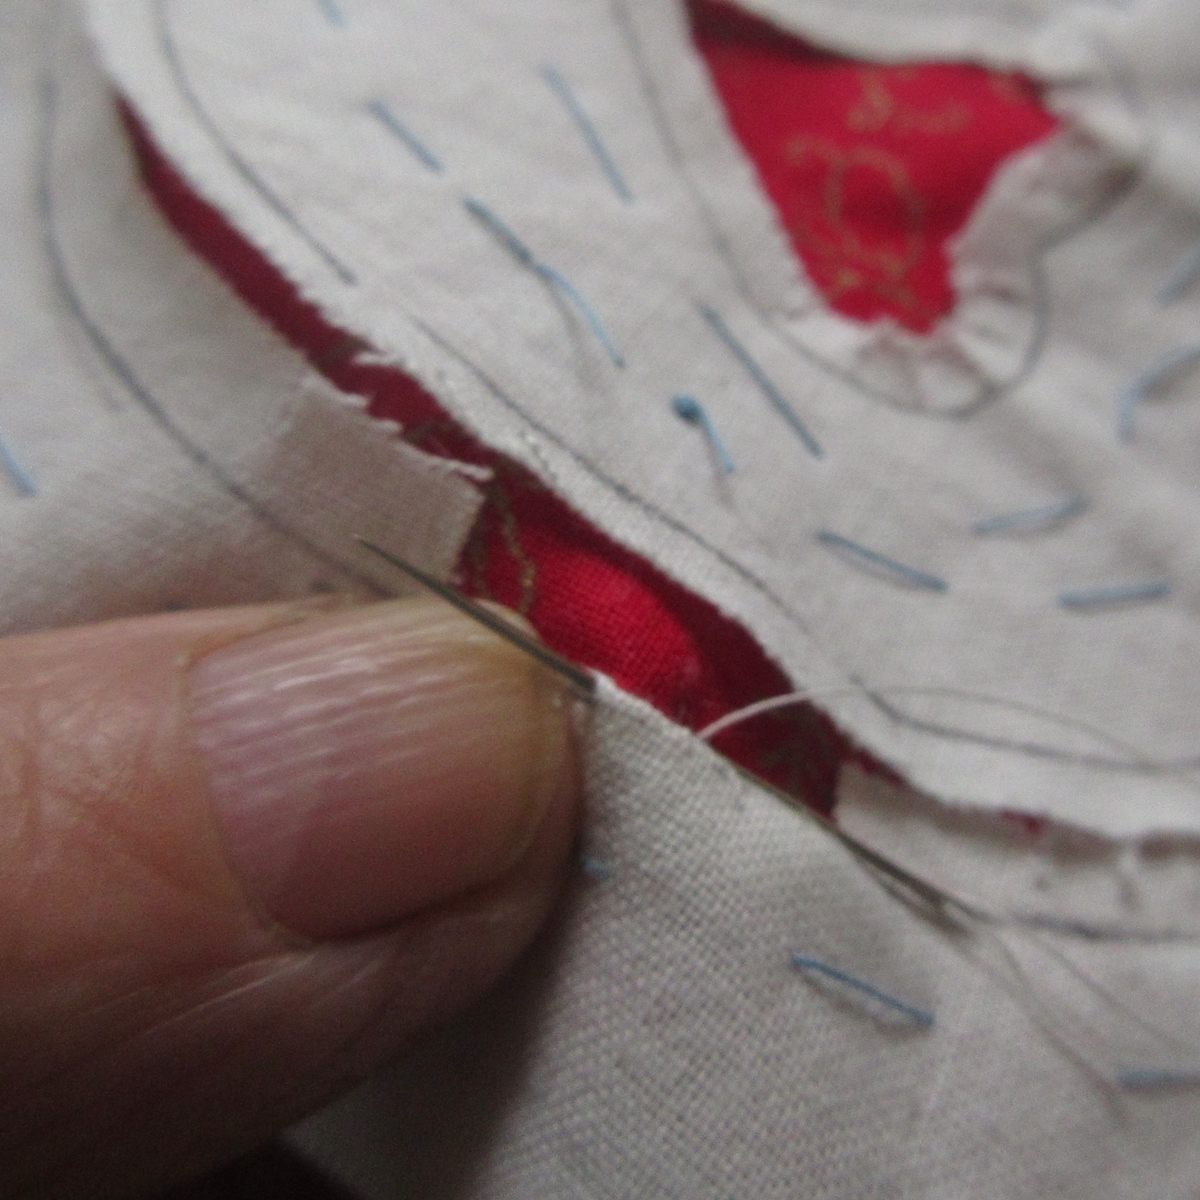
Start with the outer circle and fold under a small section of calico until the line is on the fold and hold it in place with your thumb. Using thread that matches the calico in colour, and with a knot in the end, bring the needle up from the back, just catching the fold.

Put the needle back down through the coloured fabric only and right next to where you came up.

Bring the needle back up a little way along the fold and through the edge of the fold. .............. repeat.

Just concentrate on the bit of edge that you're working on, trying to keep the drawn line on the fold. Don't worry about what might be coming up next!

For the HEART - snip the curves and then start you're sewing along a straightish edge.
At the bottom point you'll need to snip right to the line. Sew to this point then do a couple of stitches in place. Don't try and sort out the next fold until you've done this.

Similarly at the top point - sew to it, do a stitch in place, then sort out the next fold.

When all is done you carefully cut away the excess fabric on the back.

And this is the design simply quilted.

Here is a link to a printer friendly one page PDF of instructions
Practising Reverse Applique

Well, I'm off to do some more PRACTISING - after seeing those close up pics of my stitches I think I need it! - Anita x

Next Flowerpatch meeting is on 11th October when we will have a talk by Trudy Sherwood about the charity Guide dogs for the Blind and also a show and tell by our committee. It's the AGM and "Painters" of Liskeard will be joining us. Another interesting and busy evening!