Ta Da - a finish. My Hexagon Horror quilt measuring 41" x 37".
Since my last hexagon post I had filled in the sides with some almost half hexagons and I was ready to put on the borders. I cut the first one a bit longer than necessary and, with the papers still inside my hexagons, I laid the quilt edge on top of a border, on a flat surface. With the help of a little Sewline fabric glue and after pinning in place, it was quite simple to attach with the blind hem stitch on my machine - exactly as you would when doing machine applique. (See Freezer Paper Applique ). I repeated this with the other three sides.
I added two more outer borders; removed all the papers, cutting away the excess fabric of the first border, and I was ready for quilting.
2016 was supposed to have been my year for getting proficient at FMQ and I did lots of practice .... honest! I thought that this small quilt would be ideal as my first proper FMQ project, but after more play on a sample piece I chickened out and used my walking foot. I wanted to do a flower pattern in each large hexagon and worked out that I could sew from top to bottom in curves and then similarly diagonally across the quilt in both directions to achieve this. I marked out the lines with a cardboard template (this bowl seems to be just the right size for loads of my projects!!??) and a Frixion pen.
These photos show the back of the quilt so that you can see the quilting lines. The first is taken after sewing all the lines from top to bottom. The second is after adding the two diagonal lines at right angles to each other.
It worked quite well although I must admit to some puckering in the centres of the flowers and plenty of wobbly lines despite feed dogs up and an even feed foot. Rather less though than there would have been if I'd stuck to my FMQ idea!! :)
This pic shows the quilt and backing
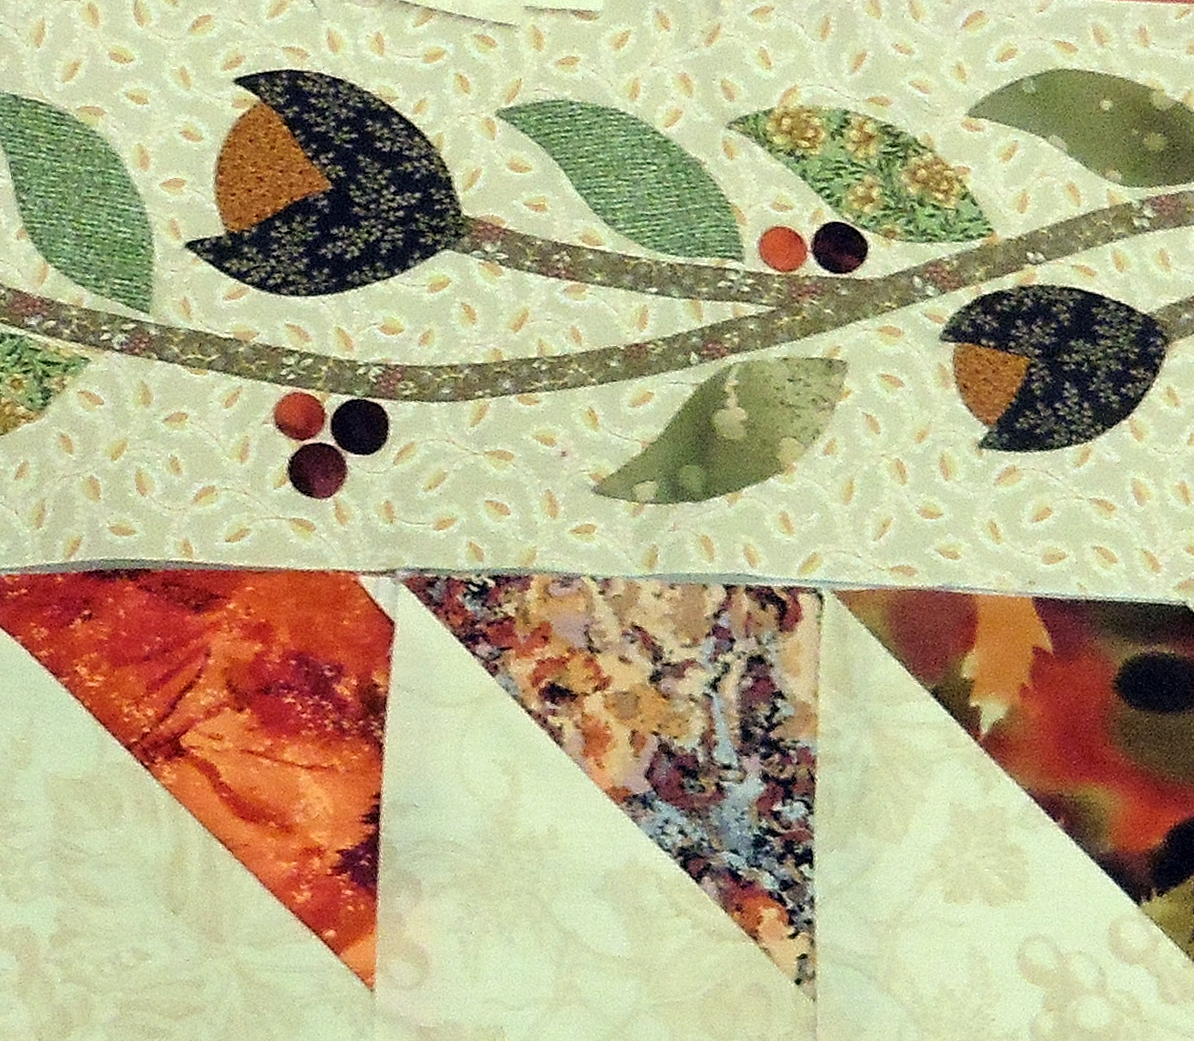
and this is a corner of the quilt. I do hope that you are impressed with my mitred corners to the borders, so as to match up the pattern ........ I know I am!!
I used my own tutorial to bind the quilt - Step by Step Quilt Binding
And these are the links to my previous posts about this hexagon quilt:
Making Donuts Hexagons Update Hexagon Horror Story
This may be my first and last Hexagon quilt ...... but you never know.
Happy stitching - Anita x
I'm linking to crazy mom quilts - finish it up friday
Friday, 10 March 2017
Friday, 24 February 2017
Jug of Flowers - lino printing
My latest embellished lino printing project - a jug of flowers ......... or rather, 3 jugs as they look so good together.
Every print turned out a slightly different colour using system 3 acrylics mixed with the block printing medium. I've printed on to calico.
This is what one of the blue prints looked like after backing with thin wadding and machine quilting with grey cotton. I quilted just outside the blue of each petal to give them a cream border. Next to it is the finished picture after using Steam-a-Seam 2 to apply fabric to each petal, centre, leaf and a strip across the jug; and embellishing by hand.
The green jug is sprinkled with red lazy daisy flowers
And the flowers in the pink jug have red tips and centres which really makes them stand out.
I bordered each print with two similar colours and mitred corners, hoping that this would make them look slightly recessed, and finished with a wider border in a similar neutral colour.
Each print measures just 4" x 6" and the hanging measures 16" x 9".
I can't quite believe how enjoyable this is to do!
Happy Sewing - Anita x
Every print turned out a slightly different colour using system 3 acrylics mixed with the block printing medium. I've printed on to calico.
This is what one of the blue prints looked like after backing with thin wadding and machine quilting with grey cotton. I quilted just outside the blue of each petal to give them a cream border. Next to it is the finished picture after using Steam-a-Seam 2 to apply fabric to each petal, centre, leaf and a strip across the jug; and embellishing by hand.
The green jug is sprinkled with red lazy daisy flowers
And the flowers in the pink jug have red tips and centres which really makes them stand out.
I bordered each print with two similar colours and mitred corners, hoping that this would make them look slightly recessed, and finished with a wider border in a similar neutral colour.
Each print measures just 4" x 6" and the hanging measures 16" x 9".
I can't quite believe how enjoyable this is to do!
Happy Sewing - Anita x
Thursday, 16 February 2017
Quilt Show in Prague at Flowerpatch
We had a real treat at Flowerpatch Quilter's recent meeting with a slideshow of Melody and Dy's trip to Prague last Springtime. They stayed at a hotel in the beautiful old part of the city and enjoyed river trips and exploring. We loved their photos of the old houses built into the castle walls, many of which are now museums. But, of course, the highlight of their trip was a visit to the Quilt Show. This was a large exhibition of over 800 quilts and 6000 visitors. It is held each year.
These are just a couple of unusual quilts among the many quilts that they showed us:
The exhibition included art quilts, quilts based on antique quilts, traditional Czech quilts, some Cuban quilts, and other international quilts and challenges. A really diverse and interesting assortment.
They met the much-travelled Gillian Travis who was exhibiting at the show and who's work I saw in Bristol. This is a little taster of some of her wall hangings
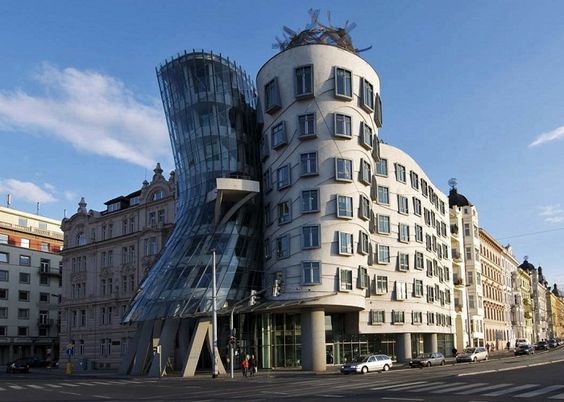
More exploring followed their quilty day and I love this modern building that they showed us. It is called the "Dancing House" or "Fred and Ginger".
Many thanks to Dy and Melody for putting together this thoroughly enjoyable evening, ably assisted by their chaps Martin and Paddy.
Liz brought along her Little Harbour quilts which she has put together as a foursome in a wall hanging. They look brilliant.
These are the two links if you'd like to see more and read a bit of a tutorial on making your own. Little Harbours at Flowerpatch Exhibition and Little Harbour Workshop at Flowerpatch
Next meeting is on 9th March when Sue and Jo will be showing us their collections of antique quilts. It would be lovely if any members who have old quilts would bring them along as well, to share with us all. - Anita x
These are just a couple of unusual quilts among the many quilts that they showed us:
The exhibition included art quilts, quilts based on antique quilts, traditional Czech quilts, some Cuban quilts, and other international quilts and challenges. A really diverse and interesting assortment.
They met the much-travelled Gillian Travis who was exhibiting at the show and who's work I saw in Bristol. This is a little taster of some of her wall hangings
More exploring followed their quilty day and I love this modern building that they showed us. It is called the "Dancing House" or "Fred and Ginger".
Many thanks to Dy and Melody for putting together this thoroughly enjoyable evening, ably assisted by their chaps Martin and Paddy.
Liz brought along her Little Harbour quilts which she has put together as a foursome in a wall hanging. They look brilliant.
These are the two links if you'd like to see more and read a bit of a tutorial on making your own. Little Harbours at Flowerpatch Exhibition and Little Harbour Workshop at Flowerpatch
Next meeting is on 9th March when Sue and Jo will be showing us their collections of antique quilts. It would be lovely if any members who have old quilts would bring them along as well, to share with us all. - Anita x
Monday, 30 January 2017
Bramley's Seedling Apple
I have been really enjoying myself - playing with printing and stitching, after the workshop with Louise Nichols a few months ago.
This is my second attempt at embellished lino printing and what better subject to choose than the wonderful and versatile Bramley's Seedling apple.
I used ordinary "system 3" acrylic paint mixed with Daler block printing medium so I had a wealth of choice colour-wise and each print tended to be a slightly different colour. These are examples of the lino prints in 3 colours.
and the resulting apples, which were printed in similar colours, after they had been embellished with fabric and stitch.
I put thin wadding on the back of each apple before I started stitching (by machine and hand) and then backed with more wadding after I had sewn them all together with the sashing and border. I actually included a little extra wadding behind the individual apples.
I hope you can see some of the very simple stitches that I used - mostly straight stitch, french knots, cross stitch and couching.
I used Steam a Seam 2 to apply any fabric pieces. Each apple print measures approx 3½" x 5" and my finished wall hanging measures approx 9" x 18".
It is over 200 years since the original Bramley tree was grown from a pip, but sadly now it seems that the tree is dying. You can read all about the apple on the Bramley Apples website.
Happy stitching - Anita x
This is my second attempt at embellished lino printing and what better subject to choose than the wonderful and versatile Bramley's Seedling apple.
I used ordinary "system 3" acrylic paint mixed with Daler block printing medium so I had a wealth of choice colour-wise and each print tended to be a slightly different colour. These are examples of the lino prints in 3 colours.
and the resulting apples, which were printed in similar colours, after they had been embellished with fabric and stitch.
I put thin wadding on the back of each apple before I started stitching (by machine and hand) and then backed with more wadding after I had sewn them all together with the sashing and border. I actually included a little extra wadding behind the individual apples.
I hope you can see some of the very simple stitches that I used - mostly straight stitch, french knots, cross stitch and couching.
I used Steam a Seam 2 to apply any fabric pieces. Each apple print measures approx 3½" x 5" and my finished wall hanging measures approx 9" x 18".
Happy stitching - Anita x
Friday, 20 January 2017
Hexagon Horror Story
I've been plodding on with my paper pieced hexagons most evenings and finally decided that I have enough to join them together. (or is it 'I have had enough!!')
I still have the half-hexagon sides to fill in, but I will leave the top and bottom pointy. At present it measures 37" x 33" and I have plans to add some interesting fabric borders.
Here are four hexagons that I particularly like.
So where is the "Horror" of my hexagon story. Well, having sewn the big hexagons into rows and bemoaning the fact that it would take me many evenings to sew these together by hand, the man in my life (who knows absolutely nothing about sewing) said "I don't see why you can't sew these by machine!".......... I can't resist a challenge!
I decided to use this stitch on my machine as opposed to zigzag which I thought would make a very stiff and obvious line.
I used grey thread so it wouldn't show too much and a shortish stitch length and width. I sewed slowly, stopped frequently and turned the needle by hand at times - it was very stressful!! .... but quick nonetheless by comparison with the hand sewing. I don't think I would have attempted this if I had been making this for anyone other than myself!
This pic compares the two different seams - hand and machine.
My two previous posts about this project are making donuts and hexagons update.
Happy Sewing - Anita x
I still have the half-hexagon sides to fill in, but I will leave the top and bottom pointy. At present it measures 37" x 33" and I have plans to add some interesting fabric borders.
Here are four hexagons that I particularly like.
So where is the "Horror" of my hexagon story. Well, having sewn the big hexagons into rows and bemoaning the fact that it would take me many evenings to sew these together by hand, the man in my life (who knows absolutely nothing about sewing) said "I don't see why you can't sew these by machine!".......... I can't resist a challenge!
I decided to use this stitch on my machine as opposed to zigzag which I thought would make a very stiff and obvious line.
I used grey thread so it wouldn't show too much and a shortish stitch length and width. I sewed slowly, stopped frequently and turned the needle by hand at times - it was very stressful!! .... but quick nonetheless by comparison with the hand sewing. I don't think I would have attempted this if I had been making this for anyone other than myself!
This pic compares the two different seams - hand and machine.
My two previous posts about this project are making donuts and hexagons update.
Happy Sewing - Anita x
Saturday, 14 January 2017
Fruitful sewing at Flowerpatch
January is the month when all the blocks that have been made for Flowerpatch Quilter's yearly charity quilt, come together at our Thursday evening meeting. How exciting to finally see them in place ready for sewing and everyone is keen to get started and take part. Hand sewing commences right there and then.
This is the fabric that has inspired the colours of fabric chosen for the quilt, many of which have come from member's own stashes. This fabric is used in the outer border and elsewhere in the quilt.
This is the gorgeous centre piece of a wreath of fruit
and here we have a tantalising glimpse of some of the borders.
This is the fabric that has inspired the colours of fabric chosen for the quilt, many of which have come from member's own stashes. This fabric is used in the outer border and elsewhere in the quilt.
This is the gorgeous centre piece of a wreath of fruit
and here we have a tantalising glimpse of some of the borders.
I love the colours and it's going to look wonderful. Monica B has done a brilliant job organising this and I can't quite believe how calm she was last Thursday!! Our Charity this year is Cornwall Blood Bikes.
I had taken along some of the sketches of local buildings that I had drawn (see my last post). This is for another project that we are doing in the next couple of months and many members chose a building to aid them in making a small A5 wall hanging. All will be revealed at a later date.
Liz B reminded us about this year's Chairman's Challenge which is titled "From Tree to Match", so plenty to inspire us and keep us busy.
The 9th February 2017 meeting will be an illustrated talk by Dy and Melody, about their "Quilt Trip to Prague".
What a great group to belong to - Anita x
Friday, 6 January 2017
From photo to line drawing
How I wish I could draw!
Drawing from life, even still life, seems an impossibility to me and even copying a photo proves difficult. Nothing ends up in the correct proportions and my efforts are always a disappoint to me.
But I have ways and means to get around this lack of talent and would like to share one way with you. I'm sure it's not the only way, and probably not the best way - but it works for me.
I have been wanting to do line drawings of some local buildings, to turn into small A5 size fabric pictures (approximately 6" x 8"). I have been out and about with my camera at the ready, and also scoured the internet for suitable pictures.
I use photo editing to rotate the picture a little if necessary and to crop in the proportions that I want - in this case 3:4. Personally I use the free to download "Photoscape" photo editing.
Then I open a word document and insert the cropped picture into it. I can change the page dimensions, margins and orientation; and format the size of the picture to be just right - in this case 15cm x 20cm. I use Microsoft Word, but for many years I used "Open Office" which is free to download and very good, too. I could also have done this online with Google Docs.
Printing next and luckily my printer will print a draft copy which is a faint image of the picture and uses very little ink. Otherwise I would alter the transparency of the picture before printing to achieve the same effect. Printing can be done in colour, but my printer is old and iffy so I resorted to black and white for some prints.
I really like this next bit as I sit in front of the computer with the cropped photo on the screen, and draw on top of the draft print, selecting the lines of the picture that I want for my fabric hanging. I use a black pen. I alter things as I go because buildings and windows might need straightening, or other bits moving about. I add quite a lot of detail as this can always be ignored later. You can see the faint print of my draft beneath the black lines.
I usually make a tracing onto blank paper now. If I can't see my lines through the paper I use a light box or tape the print to a window with the blank sheet of paper on top, using mother nature's light.
Here are a couple of other examples:
Now I'm ready to play with fabric and, for the not-quite-finished example below, I used the same method as when making Flowerpatch's Little Harbours.
I decided to try the Eagle House Hotel first because it looked so difficult, but it proved to be easier than expected. Nevertheless I always wish I had the time to do everything twice as I'm sure a second effort would turn out better! :)
Well, I hope I haven't made this sound too complicated - after the first time it's fairly quick, easy and satisfying.
Never a dull moment - Anita x
Drawing from life, even still life, seems an impossibility to me and even copying a photo proves difficult. Nothing ends up in the correct proportions and my efforts are always a disappoint to me.
But I have ways and means to get around this lack of talent and would like to share one way with you. I'm sure it's not the only way, and probably not the best way - but it works for me.
I have been wanting to do line drawings of some local buildings, to turn into small A5 size fabric pictures (approximately 6" x 8"). I have been out and about with my camera at the ready, and also scoured the internet for suitable pictures.
| ORIGINAL PHOTO |
I use photo editing to rotate the picture a little if necessary and to crop in the proportions that I want - in this case 3:4. Personally I use the free to download "Photoscape" photo editing.
| CROPPED PHOTO |
Then I open a word document and insert the cropped picture into it. I can change the page dimensions, margins and orientation; and format the size of the picture to be just right - in this case 15cm x 20cm. I use Microsoft Word, but for many years I used "Open Office" which is free to download and very good, too. I could also have done this online with Google Docs.
Printing next and luckily my printer will print a draft copy which is a faint image of the picture and uses very little ink. Otherwise I would alter the transparency of the picture before printing to achieve the same effect. Printing can be done in colour, but my printer is old and iffy so I resorted to black and white for some prints.
I really like this next bit as I sit in front of the computer with the cropped photo on the screen, and draw on top of the draft print, selecting the lines of the picture that I want for my fabric hanging. I use a black pen. I alter things as I go because buildings and windows might need straightening, or other bits moving about. I add quite a lot of detail as this can always be ignored later. You can see the faint print of my draft beneath the black lines.
| DRAWING ON DRAFT PRINT |
I usually make a tracing onto blank paper now. If I can't see my lines through the paper I use a light box or tape the print to a window with the blank sheet of paper on top, using mother nature's light.
| TRACED COPY ON PAPER |
Here are a couple of other examples:
Now I'm ready to play with fabric and, for the not-quite-finished example below, I used the same method as when making Flowerpatch's Little Harbours.
I decided to try the Eagle House Hotel first because it looked so difficult, but it proved to be easier than expected. Nevertheless I always wish I had the time to do everything twice as I'm sure a second effort would turn out better! :)
Well, I hope I haven't made this sound too complicated - after the first time it's fairly quick, easy and satisfying.
Never a dull moment - Anita x
Subscribe to:
Posts (Atom)